Starting a Minecraft server sounds like something only pros or deep-pocketed players can do, right? Wrong. Over the past few years, Minecraft server ownership has exploded—with everyone from hobbyists to budding entrepreneurs launching their own virtual worlds.
But here’s the thing: you don’t need a fat wallet to run a great server. With smart planning, the right tools, and a bit of creativity, even players on a shoestring budget can create a top-tier experience. Whether you want to build a community, run minigames, or create an immersive roleplaying world, it’s all possible—without breaking the bank. Let’s walk you through exactly how to do it.
Planning Your Minecraft Server
Before you buy anything or set up a single block, ask yourself: Why am I doing this?
Maybe it’s just for fun with a few friends. Maybe you’re building a community hub that reflects your personality. Or maybe—just maybe—you’re dreaming of becoming the next big Minecraft content creator, streamer, or server mogul. Whatever your vision, setting clear goals will help shape every decision you make—from which plugins to install, to how much you’re willing to invest in hosting or visuals.
Start by asking:
- How many players do you want to support at launch—and how many down the road?
- What gameplay style will your server offer? (Survival with tight-knit friends? A massive RPG adventure? A PvP arena with ranks?)
- Will your server be modded, plugin-based, or vanilla?
- Will it be public or private?
- Do you want it to generate revenue, or just be a fun side project?
- How often will you be able to manage and update the server?
- Do you plan on creating content (like YouTube videos or streams) around your server?
These answers don’t just impact your setup—they affect your budget, hosting needs, and community management plan. A little clarity now goes a long way toward avoiding headaches (and unexpected expenses) later.
Choosing the Right Hosting Option
Now, let’s talk about one of the biggest questions: Where do I host my server?
If you’re tech-savvy, self-hosting might sound appealing. You get full control, no recurring fees, and the satisfaction of running everything yourself. But between internet speed limitations, potential downtime, and the risk of exposing your home IP, it’s usually not worth the hassle for beginners or serious projects.
That’s where budget hosting comes in—and PebbleHost is our top pick. Keystone Builds has proudly partnered with PebbleHost for over two years, and they’ve delivered nothing but solid performance.
Why we love PebbleHost:
- Budget-friendly plans (as low as a few dollars per month)
- Reliable uptime to keep your world online 24/7
- Smooth performance (even with plugins or moderate modpacks)
- An intuitive control panel for easy management
- Fast, helpful customer support that actually knows Minecraft
If you’re looking for a trusted, beginner-friendly hosting option, this is it. PebbleHost makes it easy to start small and scale up as your player base grows.
Essential Features to Look for in a Budget Host
When you’re watching your spending, you still need a host that gets the job done. Here’s what you shouldn’t compromise on:
- Strong CPU performance – for handling chunk loading and redstone-heavy builds
- SSD storage – fast read/write speeds reduce lag when players teleport or load new areas
- Uptime guarantees – 99.9% or higher is ideal for consistent access
- Responsive support – issues will come up, so quick help is a must
- Scalability – make sure you can upgrade easily as your community grows
- Mod/plugin compatibility – especially if you plan to run Spigot, Paper, or Forge
The good news? PebbleHost checks all these boxes and more, making it one of the best bang-for-your-buck options in the Minecraft hosting world.
Setting Up Your Server
Ready to go? Here’s your game plan:
- Pick your Minecraft version – Choose something stable and widely used to ensure plugin compatibility and community support. Paper is a great optimized version of Spigot that’s ideal for performance and plugins. You could also try Purpur if you want even more features, or Fabric if you’re leaning towards lightweight modded gameplay. Avoid cutting-edge versions unless you know what you’re doing—they often break plugins and cause instability.
- Install your server – Your host should offer a control panel like Multicraft or Pterodactyl. From there, select your server type, allocate RAM (start with 2-4 GB for small servers), and configure the basics like server name, whitelist, and MOTD. Don’t forget to enable online mode for authentication!
- Tweak your settings – This step is key for optimizing performance on a budget. Reduce your view distance to 6–8 chunks to ease server strain, especially on low-tier plans. Lower entity activation ranges, limit mob spawns in non-essential areas, and use Paper’s “bukkit.yml,” “spigot.yml,” and “paper.yml” files to fine-tune performance even further. Enable async chunk loading if available to reduce tick lag.
- Add a few key plugins – Plugins can totally change your server—but too many will hurt performance. Start with essentials like:
- EssentialsX – for basic commands, homes, warps, and economy features
- LuckPerms – a powerful, lightweight permission manager
- Dynmap – a live online map that keeps your players engaged
- ClearLag – helps remove excess entities and reduce lag
- GriefPrevention – great for survival servers where land protection matters
If you want crossplay between Bedrock and Java, consider adding GeyserMC (with Floodgate for offline servers). It’s a game-changer if you want mobile and console players to join your server seamlessly.
Pro tip: always test changes on a local copy or use a staging server if possible. That way, you won’t accidentally crash your main world during setup!
Managing and Growing Your Server Community
Building the server is just step one. Now, you need to create a place players want to return to—and invite their friends.
Try these tips:
- Start a Discord to centralize your community and announcements
- Run weekly events – anything from parkour contests to seasonal festivals
- Offer cosmetic rewards or VIP ranks – make them fun, not pay-to-win
- Create a social media presence – share screenshots, event highlights, or update logs
- Listen to feedback – your players are your best source of ideas
Consistency is key. Be present, encourage player creativity, and celebrate the community. The more your server feels like a home, the more players will stick around.
Enhancing Your Server with Quality Builds
Let’s be real: nobody wants to hang out in a spawn area made of cobblestone and glowstone.
Good builds create immersion. They show your players that you care. A well-designed hub or spawn area can serve as a central hangout, event space, and first impression for new players. But building a spawn, town, or dungeon from scratch can eat up hours—time you might not have, especially if you’re managing everything solo.
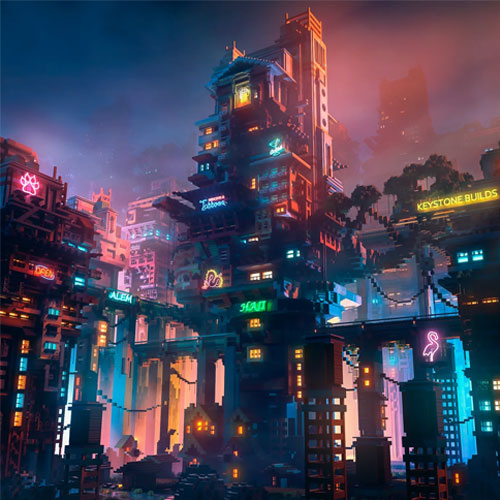
That’s where Keystone Builds comes in. Our pre-built maps are:
- Affordable – priced for budget-conscious creators
- Ready to install – just drag and drop
- Professionally designed – with incredible detail and polish
- Thematic – from medieval towns to fantasy dungeons and beyond
Using a pre-built map lets you spend less time building and more time growing your server. It’s one of the easiest ways to instantly upgrade the look and feel of your world.
So here’s the bottom line: you don’t need to spend big to build big.
By planning smart, choosing the right host like PebbleHost, and adding polished builds from Keystone Builds, you’ll be well on your way to running an amazing Minecraft server—even on a tight budget.
Whether you’re starting a private SMP for a few friends or launching your own server brand, you can do it affordably and professionally. The tools are out there—you just need to use them wisely.
Ready to upgrade your server with stunning builds? Check out the Keystone Builds store and explore our collection of high-quality, pre-built maps.